Facebook has billions of active users, and the number is ever-growing. If you want to increase your business, you must create a Facebook business page to build your online presence, advertise, and market your products. A Facebook business page will provide an additional point of contact for customers to find out more information about your company and what you offer.
Facebook marketing is an essential part of growing your business with digital marketing. You must create a Facebook business page if you want to get some amazing results from your online marketing efforts.
Creating a Facebook business page can be a daunting task for some business owners, but the process is simple and intuitive. Although it is possible to create a page without spending money, you will have to set up a personal Facebook profile on Facebook, which may not be ideal for some businesses. However, if you have already created an account on Facebook for your personal use, then you can use your personal account to create a Facebook business page.
If you’re not sure how to get started, we’ve put together a guide to help you navigate the process.
Table of Contents
Important considerations for creating a Facebook page
Creating the Facebook business page in the right way is the first step in starting Facebook marketing. Hence, as a business owner, you must spend some time and effort to create your Facebook page, as well as be creative in doing so.
There are many aspects that you need to consider before you create a Facebook business page for your brand or organization.
Your Facebook page must focus on what your business does rather than on yourself or any of the people involved with it. Your target audience will like seeing content that talks about the company’s products and services, not just you.
Also, as a business owner, you should make sure that your Facebook page is up-to-date and shows off all the latest information about your brand. This will help you stay connected with your customers by giving them access to current news and events about your business. The more active it is, the more people will like it.
How to create a Facebook Business Page
Step 1: Create the Page
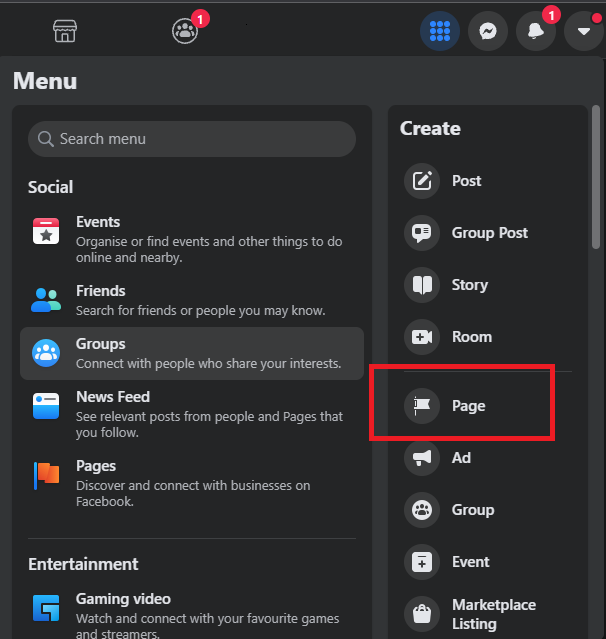
To create a Facebook business page, log in to your personal Facebook account and click on the 9 dots on the top right corner (highlighted in the image below in blue) .
The select “Page” in the right panel in the section titled “Create“.
Step 2: Choose a Facebook page name
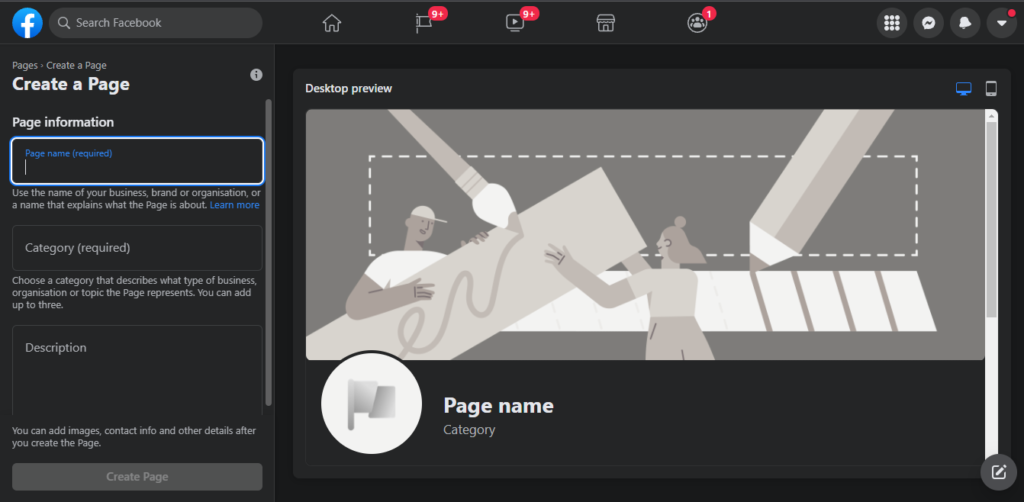
Choose a unique name for your Facebook page which is either the same as your business name or as similar to it as possible. This name will be used to identify your page in Facebook search results.
Your business page name can be as short or long as you’d like, but make sure it’s simple and easy to read. For example, “Erik’s” is not a particularly good name for a Facebook page, but “Erik’s Amazing Pizza” is.
Step 3: Select Page Category
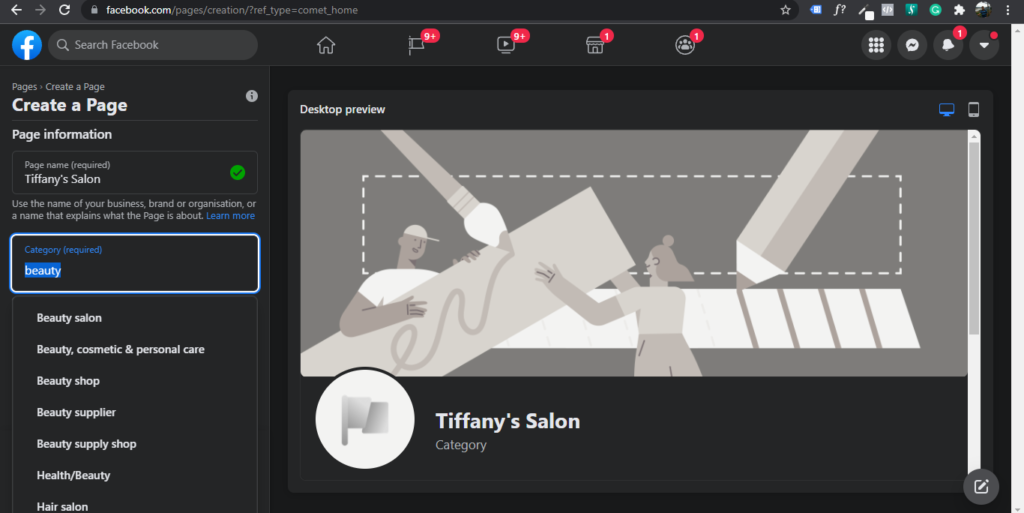
Next, you will be asked to select a business category for your Facebook page. The best thing about choosing the right category is that it allows Facebook users to search specifically for pages within your chosen category. For example, if you run an accounting firm and choose “Accounting” as your business category, your Facebook fans will be able to search for pages within that category and find you.
Step 4: Add A Description
You will then be asked to add a short description for your page. This is where you can briefly describe what your business does and how it helps people. Be sure to include any keywords that might help Facebook users find you in search results, as well as a URL if applicable.
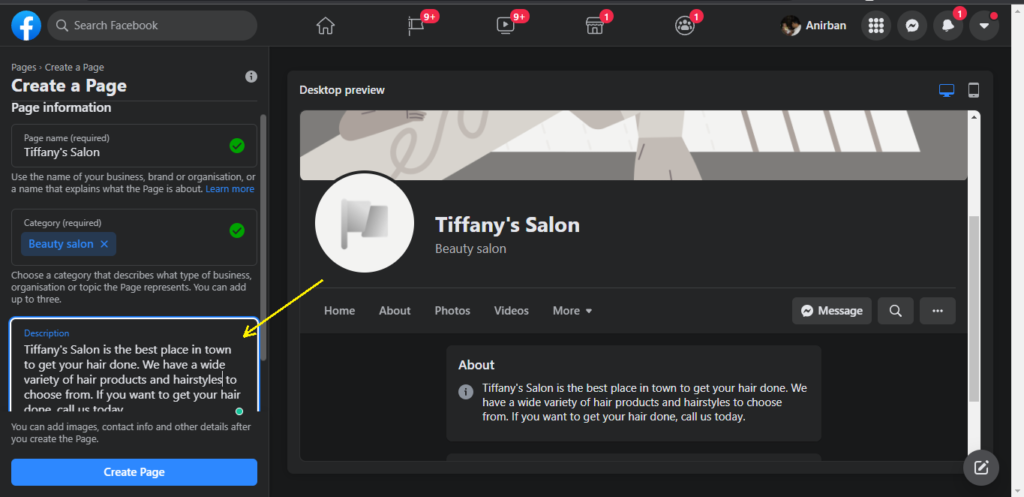
Then press on the “Create Page” Button.
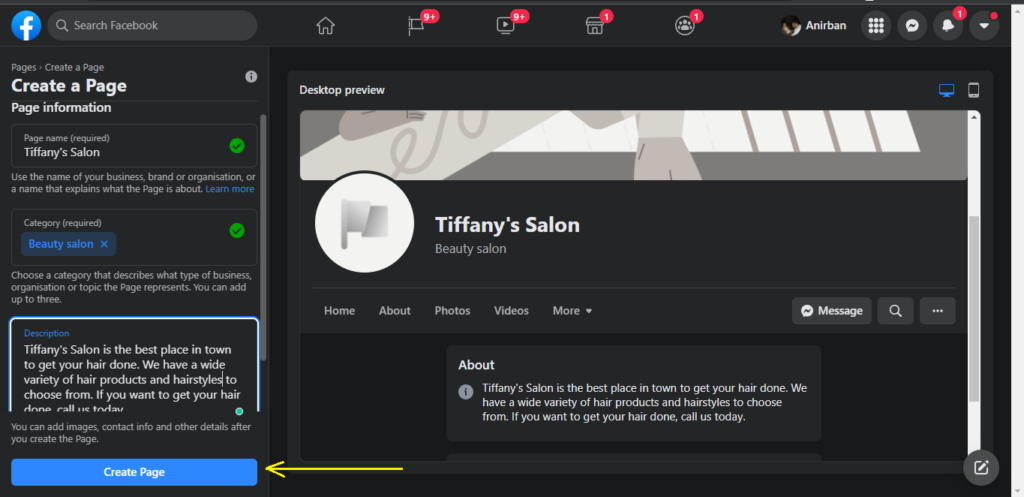
Soon, Facebook will tell you that your new page has been created.
Congratulations! This step to create a Facebook Business Page is complete. Your new Facebook page is now live and ready for business.
Step 5 (Optional): Connect the page with WhatsApp
After this, Facebook will prompt you to connect the page with WhatsApp. WhatsApp is a messaging app used for texting and group chat. It’s not as popular as Facebook, but it can be an effective tool to connect with your customers.
This step is optional. You can create a Facebook Business Page even if you do not connect the page with WhatsApp.
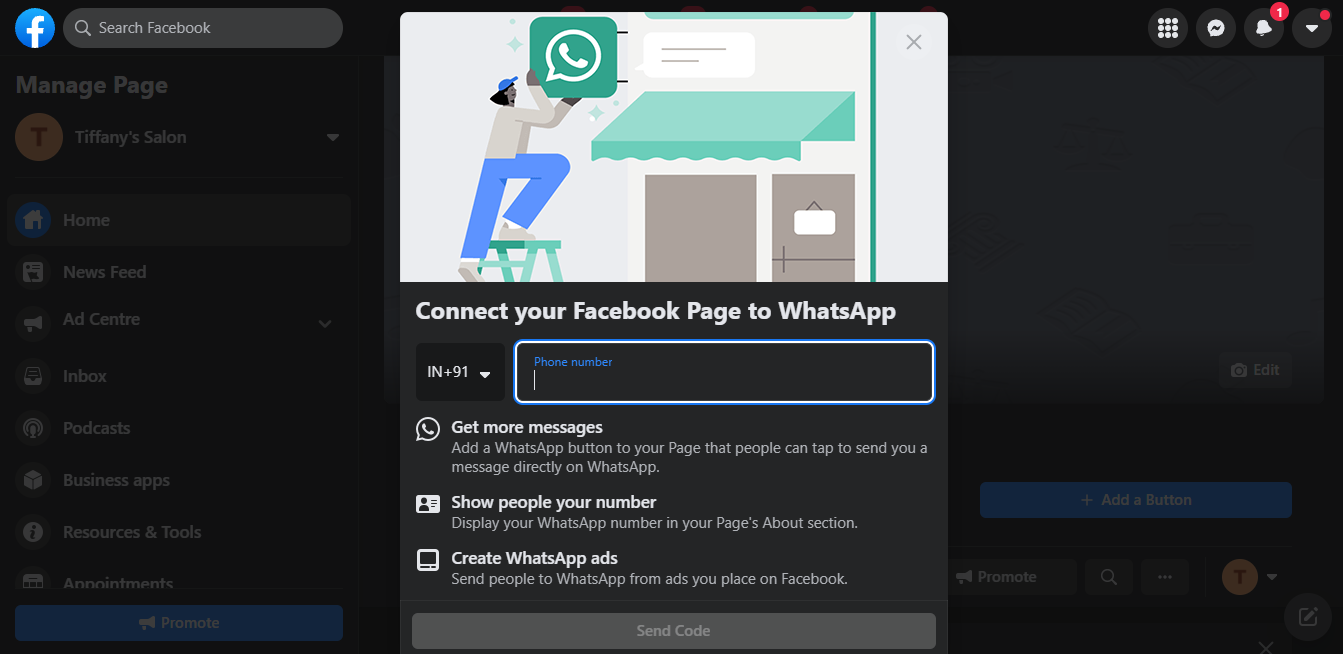
Follow the instructions to connect your Facebook page with WhatsApp. This will add an action button through which your customers can chat directly with your new Facebook page.
If you want to learn more about how you can use WhatsApp for business, read this article: How To Use WhatsApp For Business.
Step 6. Add some branding
Here is what the business page looks like just after it is created.
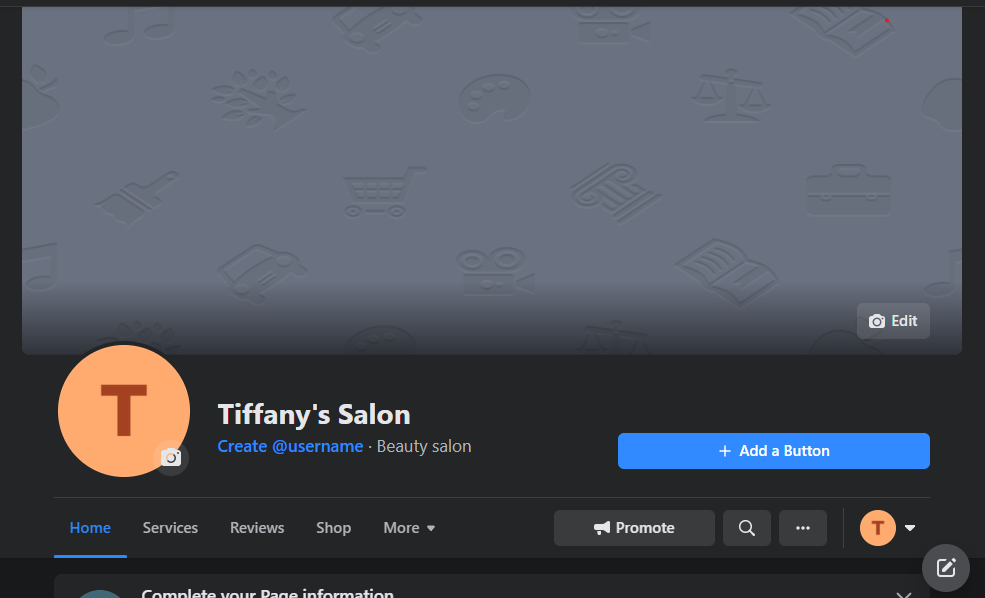
Not at all pretty or useful, is it?
So, let’s make the page better.
The first thing you should do as the next step to create a Facebook Business Page is add some branding to your page. The basic Facebook page template doesn’t have any logos or graphics, so the only branding on it is what’s displayed in the navigation bar at the top of the screen.
You can add a logo by going to the Edit Page > Add a Branding section.
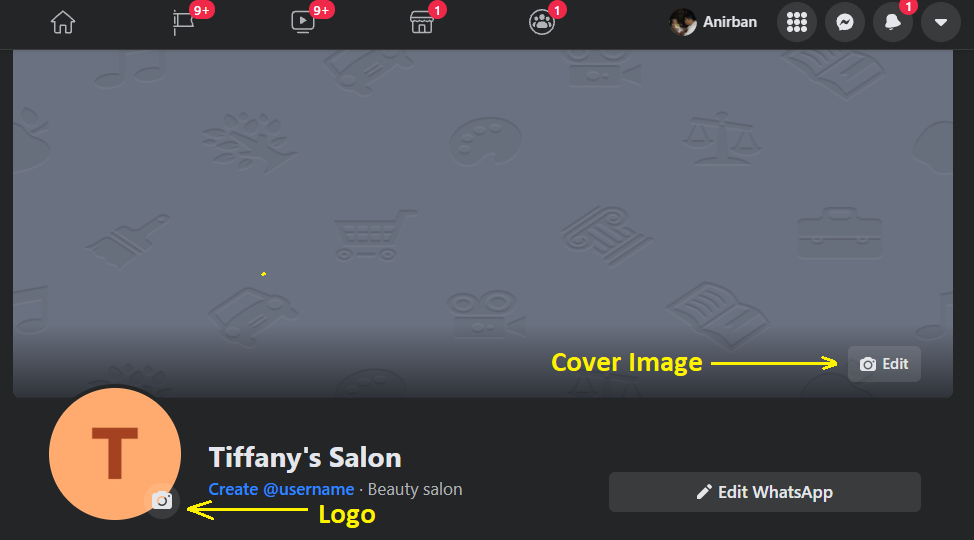
A. Add Profile Picture
The next step is to upload your company logo as your profile photo so that it appears at the top of every page you create for your business, as well as in the “About” section of your personal page. This will be a huge asset to potential customers who are looking for businesses in your industry, and it also shows that you have been able to create an official company logo from the get-go.
B. Add Cover Image
This is your main photo on Facebook and should be unique to you. Make sure that it fits with your business’ image and does not contain any logos or trademarks from other companies. Make the cover photo interesting, so that people will want to click on it and explore what you have to offer.
Step 7. Add more Business Information
The next step is to fill in all the necessary details. To do this, you’ll need to include your company name, address, phone number, website address (if any), and email address.
There are two ways to do this:
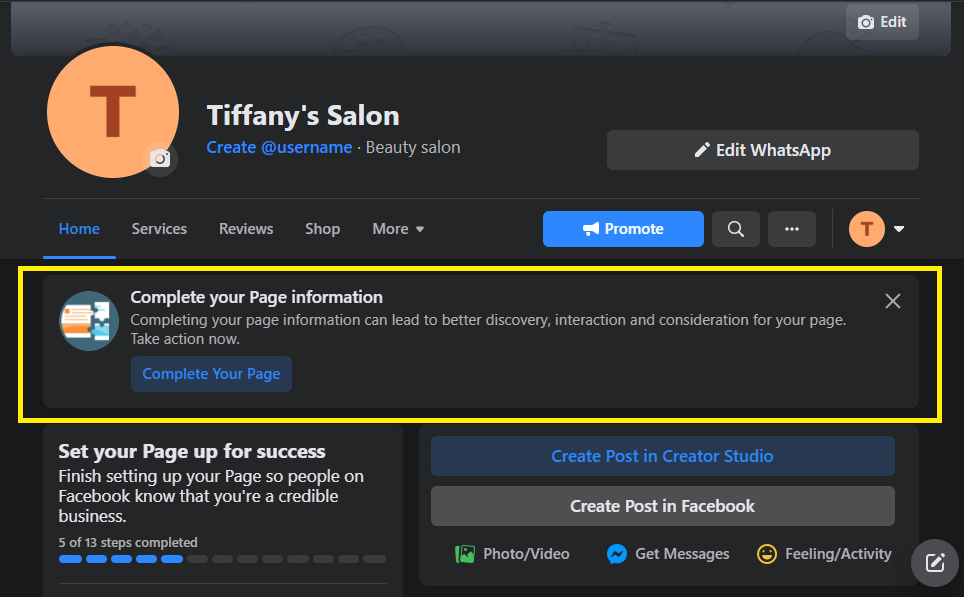
- On your new page, click on the Complete your Page information button to edit the information on the page.
- The other way to do this is to scroll down to the “Edit Page Info” option in the left-hand menu on your page.
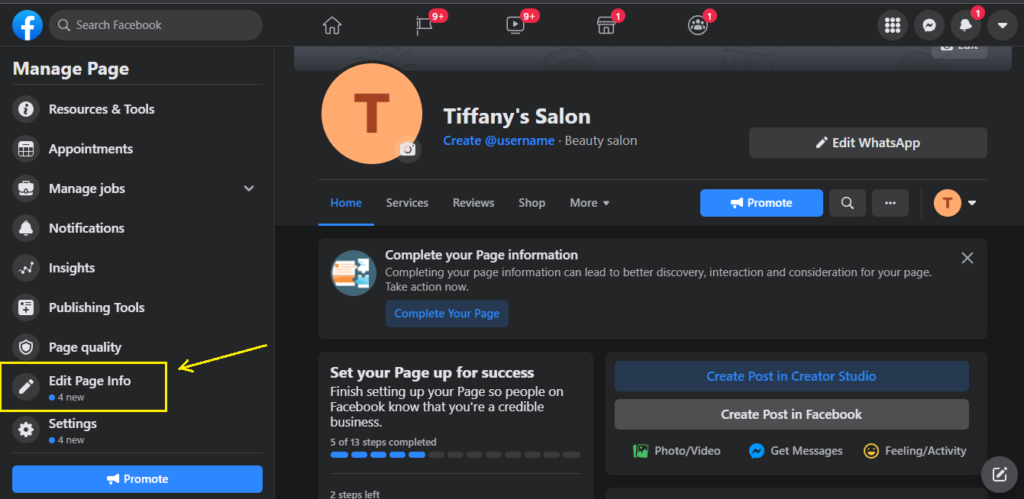
This is where you can customize your business page with some important settings. Let’s discuss these, one by one:
A. Name
This is the page name that you selected while creating the page.
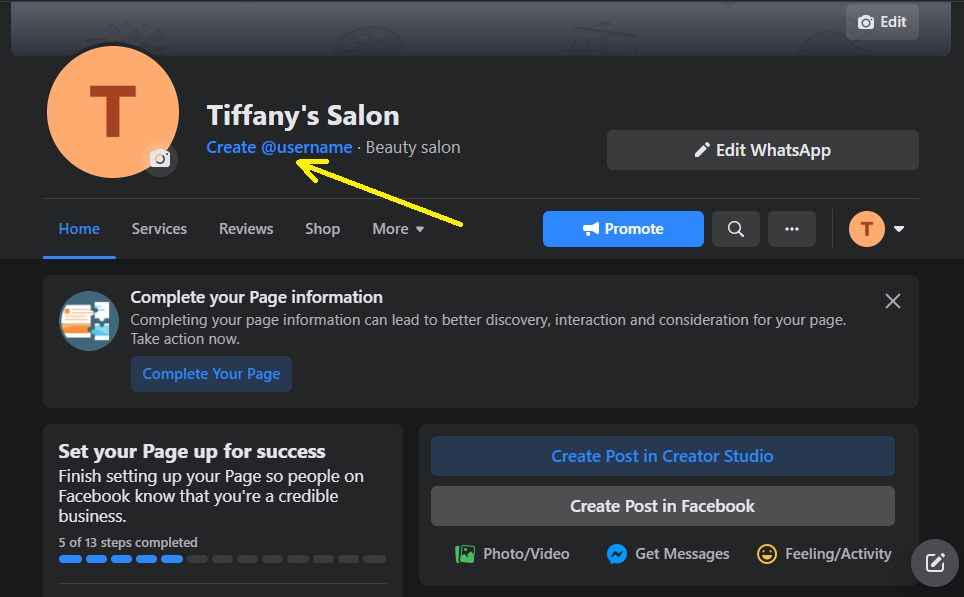
B. Username
Create a username that will make it easy for people to find the Facebook page. Make it simple but unique. It should also be short and easy to remember.
C. Description
This will show the description of the business that you filled up earlier. If you had skipped that step, fill it in now. Remember that this is your company’s description on Facebook, so keep it short and sweet.
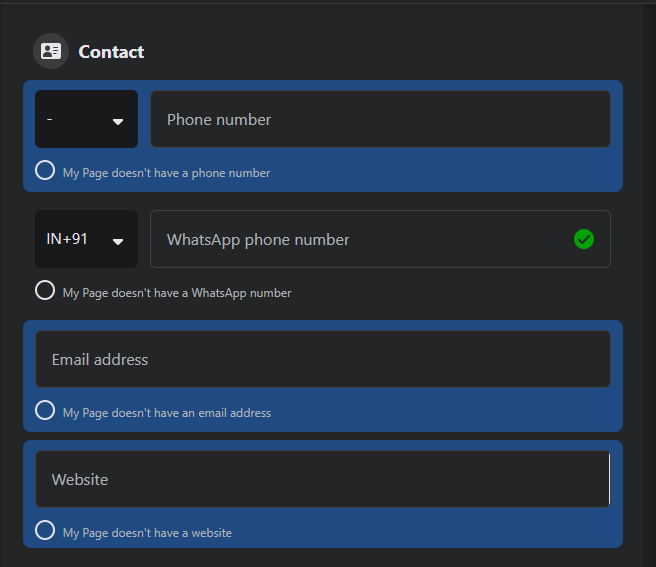
D. Phone number
It is important to provide your Facebook users with your contact information so that they can contact you for business.
E. Email Address
Next, it’s time to add an email address for users to know where they should send their questions and comments. You can use the same name as your Facebook page, but you need to ensure that there is no conflict between the two.
F. Website Address
If you have a website, add its URL (address) to the Facebook page. This will allow people to visit your website to find out more about your business. This is a clever way to drive traffic to your website, which will help you generate more leads.

G. Location
If you have a physical location, add the address here. This will make it easier for people to find you and visit your office or store.
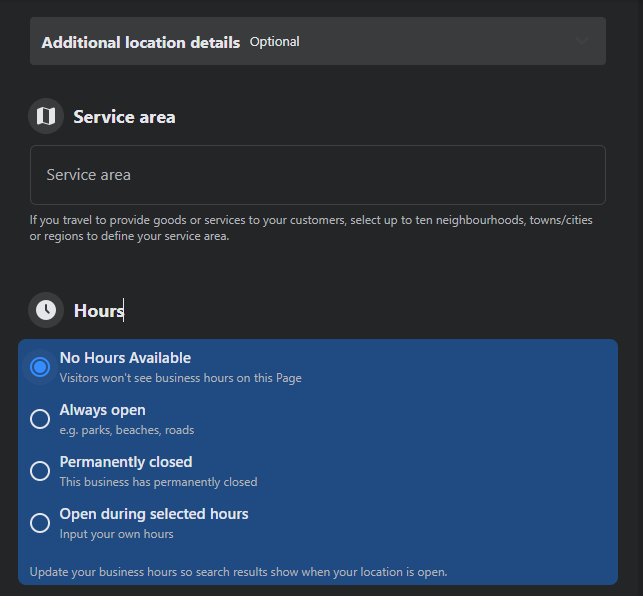
H. Service Area
If you have a service area, add the location of your customers here. This will help people find out where they can visit and see if you offer any services in their local area.
I. Hours of Operation
Add the hours of operation here. This will help people find out if you are open on weekends or during certain days.
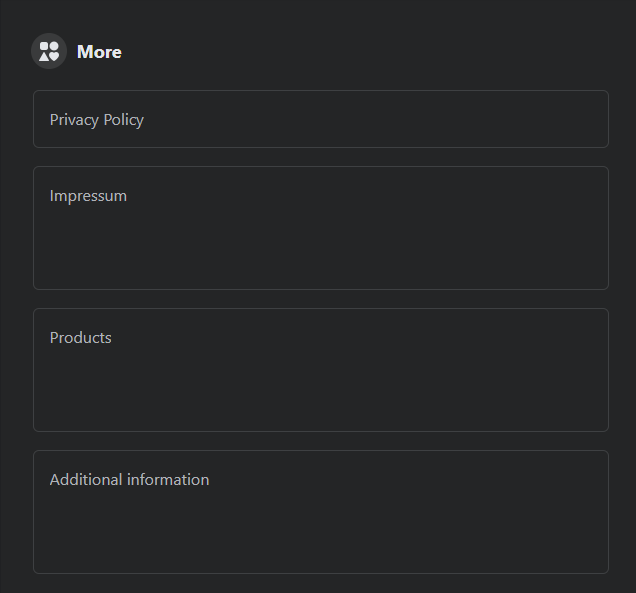
J. Privacy Policy
If you have a privacy policy, add it here. This will help people know how they can contact you and what type of information you collect from them.
K. Impressum
This is the legal notice for your business, containing the legal identification number of your business. It is a legal requirement that you include it. In most countries, if your business is not registered, this notice will be the only proof of its existence.
L. Products
If you sell any products or services, it’s important to add them to the Facebook page. Facebook will show these in a tab on the top of your page. Your potential customers will be able to search for your products and services through the “Search” section of Facebook, so they must be easily accessible on your page.
M. Additional Information
If you have any additional information about your business, add it here. This is an important section, as it will help people find out more about your business and what they can expect from visiting your Facebook page.
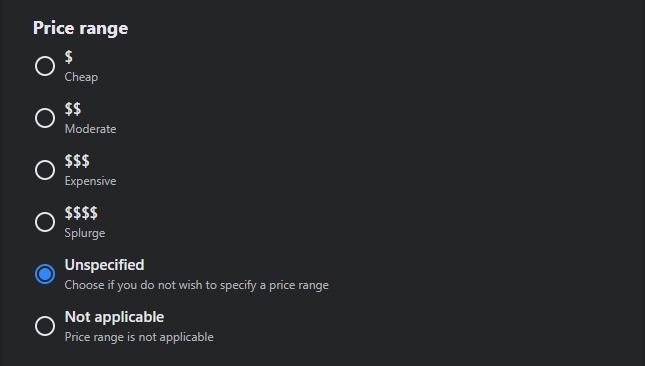
N. Price Range
If you have a price range, add it here. This will help people know if they can afford to buy your products or services and is an important section for online businesses.
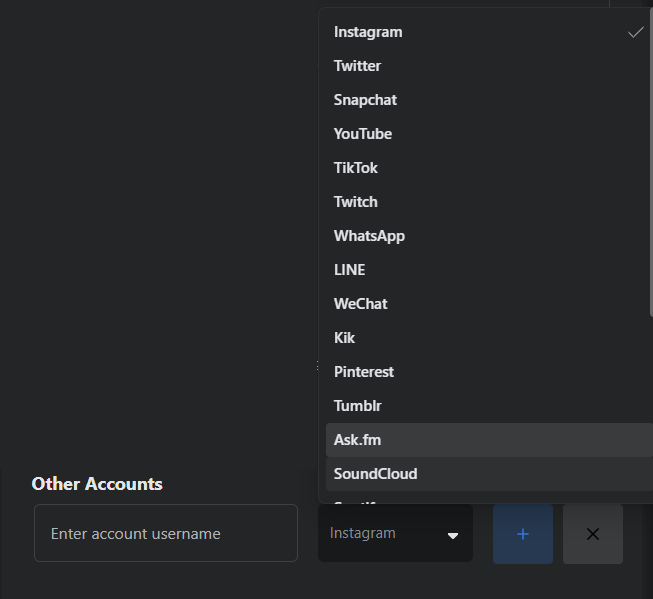
O. Other Accounts
If you have any other social media accounts, add them here. This will help people follow your accounts on other social networks like Twitter, YouTube, TikTok, etc.
Step 8 (Optional): Connect the page and your Instagram account
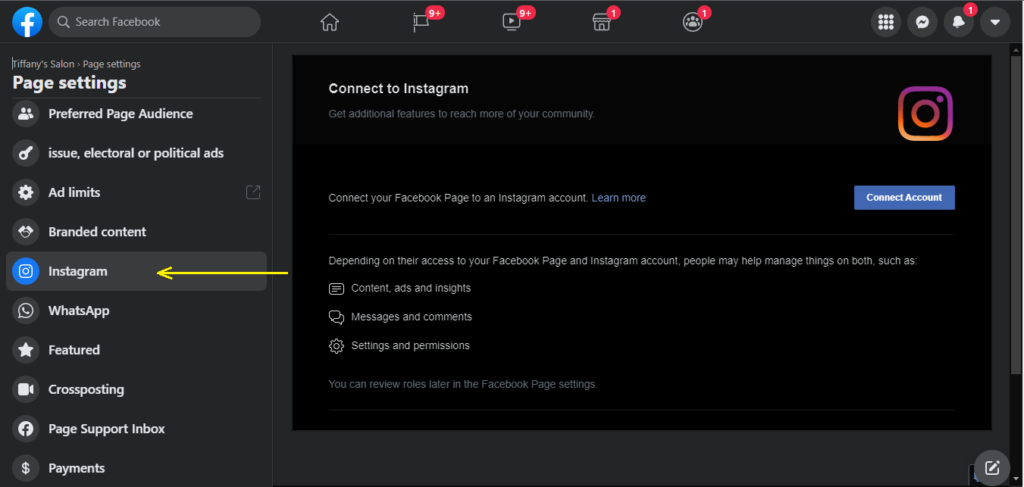
The process is quite simple. Once you have completed all the earlier steps to create a Facebook business page, go to the “Page Settings” section of your page (on the left panel) and select “Connect with Instagram”. Click “Next” and follow the instructions.
These were the steps to creating a Facebook business page. We will now come to making it found by the world.
So now your page is ready, and it is time for you to tell the world proudly about it.
Step 9: Promote and Manage Your Page
Once you create a Facebook business page, you will now have to promote it and keep it active. Here are the things you can do:
A. Get people to like your page
Now that you have your new Facebook page up and running, it’s time to start getting some likes on your page. To do this, go back to the “Pages” section of your Facebook page and click on the “Get Likes” button.
There are three separate ways to invite people to your new Facebook page.
- The first is by using the “Invite Friends” button in the upper right-hand corner of your screen, which will allow you to invite up to 10 friends at a time.
- You can also go to the “Pages” section of your Facebook page and click on the “Invite Friends” button there, which will allow you to invite up to 50 friends at a time.
- The third way is by using your email address (or phone number) as an invitation code. You can also send a link to your page to someone by email or text message, but I prefer the other two methods because it is easier for me and my clients to invite people via Facebook than through Facebook itself.
B. Keep Your Pages Active
1. Post regularly
To keep your new Facebook page updated, post interesting and informative content on it at least once a week. This will give your target audience a reason to come back to the page and you will start seeing more likes as time goes on.
This will also make sure that people know you are active and running your business successfully. It is also good to put out some content for the holidays (Christmas, Thanksgiving, or Hanukkah) so that you can gain some Facebook followers.
I recommend that you set up a schedule for posting content on your page and make sure that you post regularly, at least once per week. This helps build awareness of your brand and keeps people interested in checking out the new posts!
2. Post videos
Videos are an excellent way to engage your followers and attract new ones. They can be used to provide more information about your products or services, showcase a special event, show off something that you did for a client, or just share some fun content with them.
Frequently Asked Questions
What is a Facebook business page?
A Facebook page is a place where you can put information about your brand or organization. You can have people like your page and become a part of it. It is a wonderful place to put announcements, specials, and other types of information that will catch people’s attention.
A business’s most valuable tool for reaching its customers is its Facebook page. It should be used for all kinds of things, including updating the status, sharing content, promoting events, and connecting with their customer base.
What is the difference between a Facebook page and a Facebook business page?
A Facebook page is a profile for an individual, organization, or business on Facebook. It is primarily used for personal or public expression, connecting with friends and family, and sharing updates and content. On the other hand, a Facebook business page is specifically designed for businesses and organizations to promote their products, services, and brand. It offers features tailored to businesses, such as insights and analytics, advertising tools, e-commerce integrations, and the ability to create events and sell tickets. Having a Facebook business page allows businesses to establish their presence on the platform, engage with customers, and reach a wider audience through targeted marketing strategies.
Is facebook business page free?
Yes, Facebook business pages are free to create and maintain. Posting content on your Facebook Page is also free but, if you want people to see it, you must pay to “promote” it through Facebook Ads. Promoting a post lets others know it is available for them to view.
Should I create my own logo for my business page or should I use the same one as my personal profile?
Logos are a very personal thing. You should have one that fits your brand or business. Consider your target audience and what type of image they will want to see from you. If you are using the same logo as your personal profile, people will not know that you have a business page. It would be good to create something that has more of an attention-grabbing or professional look.
Conclusion
This article has covered a lot of information about how to create a Facebook Business Page, and I hope that you have found it useful. As always, if you have any questions or comments, please feel free to leave them below! Let us know if you created a Facebook page after reading this guide and how your experience was.
If you want to get started with Twitter Marketing too, don’t miss our Complete Guide For Creating A New Twitter Account.






Leave a Reply