WordPress is a content management system that is used by millions of people around the world. It is an extremely popular platform and because of that, it is a favorite target for hackers.
The most exploited page of your WordPress site is the login page. This is probably because it is the page that allows you to access your site and all its functions. Millions of people use this page every day, so it has a considerable risk of being hacked.
In this article, we will show you how to improve WordPress login security with the Wordfence Security plugin and make it more difficult for hackers to gain access to your site.
Wordfence Security is an effective plugin that can protect your WordPress login and do much more. It has a free version and premium plans starting at $99 per year.
For this tutorial, we will be using the free version that you can easily download from the WordPress plugin repository.
Table of Contents
Install Wordfence
You can find the Wordfence Security plugin in the WordPress Plugin repository. Download and install it on your WordPress site.
The easier way will be to go to Plugins > Add New Plugins on your WordPress site.
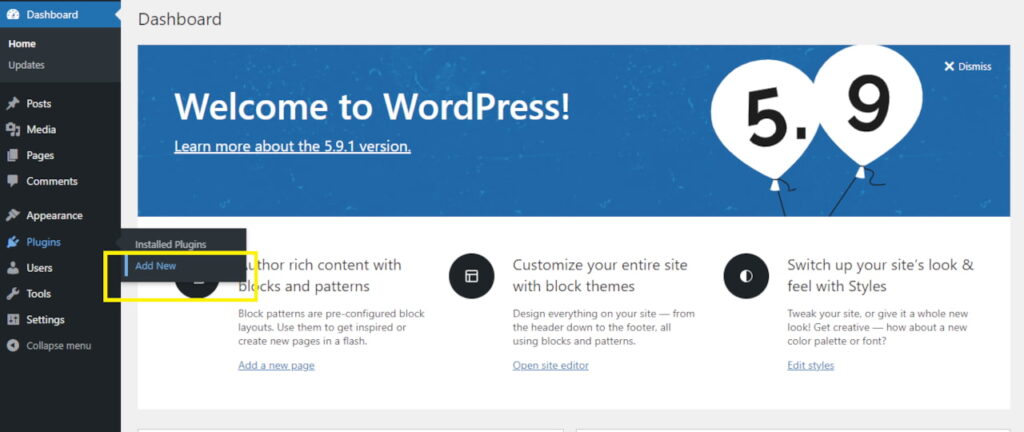
Type in ‘Wordfence‘ in the search box on the top-right corner and press enter.
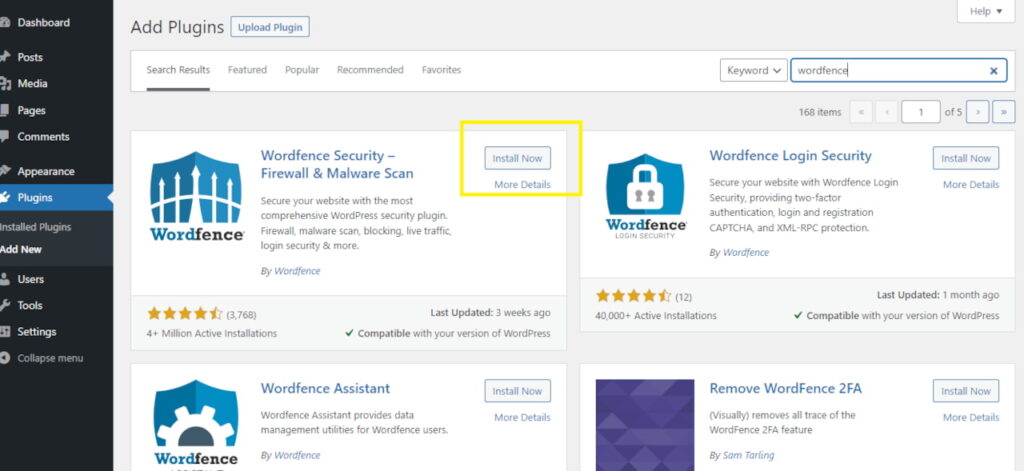
Then install and activate Wordfence.
Once you do that a notification will appear on the top of the WordPress dashboard asking you to complete the setup of the Wordfence plugin in a few steps. It is a fairly straightforward process and there is an extremely helpful wizard to guide you through it.
Just follow the steps and you will be able to finish the setup of Wordfence with the default security options.
Steps To Improve WordPress Login Security
After the initial configuration is done, you will find several menu options in Wordfence.
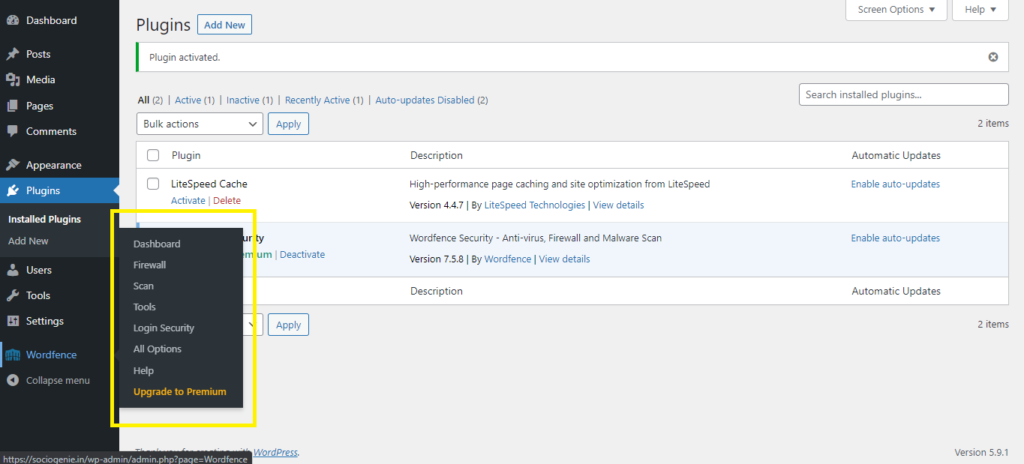
Now you need to complete the steps to secure your WordPress login by going to the option “login security”.
A. Set Up Two Factor Authentication (2FA)
Two-factor authentication in Wordfence can be made mandatory for some user roles and optional or disabled for others.
By default, the users with the role of “administrator” have the maximum rights in WordPress and they can modify the entire site. So, hackers also love to break into a WordPress site using administrator privileges.
Therefore, we strongly recommend that you enable 2FA for every user with an administrator role. For better security, enable it for all user roles, except “Subscriber“.

Once you do this you will be prompted to set up Two-factor authentication for your user id. You can download the Google Authenticator app on your phone and set it up. Make sure you also download the backup security codes that Wordfence will give you just in case you lose your phone.
(If you are not familiar with the process, here are the instructions for setting up Two Factor Authentication with Google Authenticator. )
All other users with the roles for which you have made 2FA mandatory will also have to go through this process when they log in for the first time after you enable this feature on Wordfence.
Henceforth, whenever you log in, you will have to go through this additional layer of security. Wordfence will ask you for the 2FA code whenever you log in.
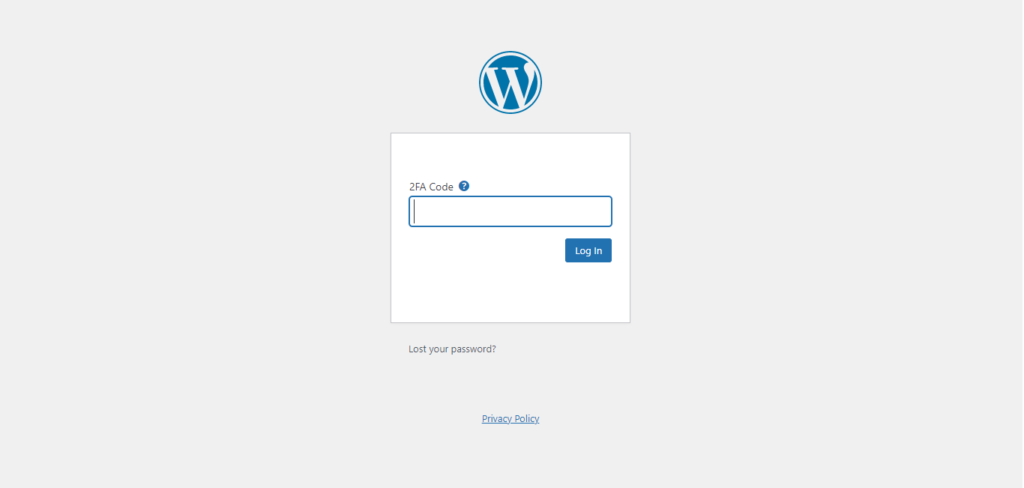
This can however become a problem sometimes if you have to log in to your site frequently. So Wordfence gives you an option to disable this temporarily.

When you enable this option, the site will not require you to give a code for the next 30 days. In our opinion, you must not enable this unless you have a real need. It can potentially expose your site to hackers.
B. Disable XML-RPC
XML-RPC is a feature needed only if you are using the Jetpack plugin by Automattic, or if you access your WordPress site with the WordPress mobile app. Very few other plugins/apps need it. If you are not using it, you must disable XML-RPC on your site.

The reason for this is that XML-RPC is one of the most exploited features of WordPress. Hackers love it, and they use brute force attacks to break it and enter your site.
If you have to keep XML-RPC enabled, then make sure to enable the “Require 2FA for XML-RPC call authentication” option to “Required“.
C. Setup Google ReCAPTCHA For Your Login And Comment Forms
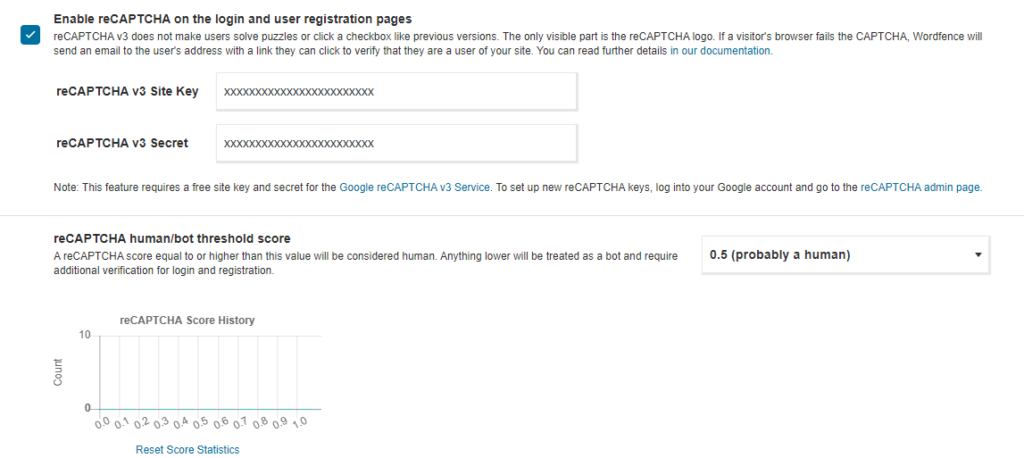
Adding Google ReCAPTCHA to your login and registration pages helps secure your WordPress site from hacking and brute force attacks. Wordfence makes it easy for you to set it up.
After the 2FA options on the Login Security page, you will find the option to set up Google ReCAPTCHA Version 3. You can head on to the Google ReCAPTCHA site, log in with your email id, and set up ReCAPTCHA. Then copy the reCAPTCHA v3 Site Key and reCAPTCHA v3 Secret to the Wordfence page.
D. Secure Your WooCommerce Registration and Login Pages
If you have set up an eCommerce store with the WooCommerce plugin, then you need to enable this option. WooCommerce adds its own login/registration pages to the WordPress site. These too can be exploited by hackers. Enabling this option will ensure that Wordfence will add a layer of security to those pages as well.

Bonus Tips
E. Avoid Common Usernames And Passwords
Avoid using usernames like “admin”, “administrator” etc. which are super easy to guess. Hackers use Brute Force attacks on websites wherein they try to break into websites that use these common usernames. Make the usernames and passwords on your website complex and as less obvious as possible, so that they are not subject to these attacks.
F. Block Invalid Usernames
Go to Wordfence > All Options on the left toolbar (It is located just below the Login Security option) and scroll down to Firewall Options > Enable brute force protection.
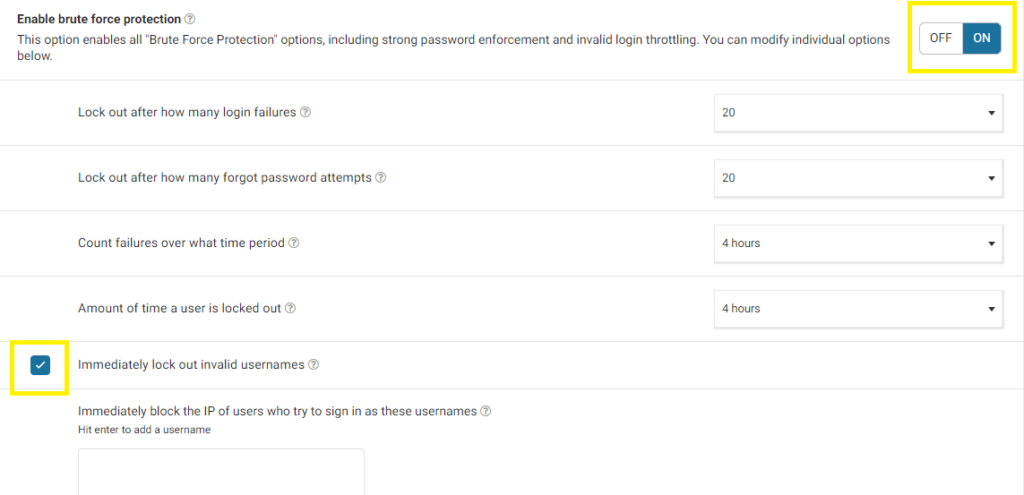
Keep the enable brute force protection setting on.
Scroll down further and enable the Immediately lock out invalid usernames option. This will ensure that whenever someone tries to access the site with an invalid username, his / her IP will get blocked.
The problem here is that one of the genuine users may mistype their username and get banned by Wordfence. If that happens, another user with admin rights will be able to log in to Wordfence and unblock the IP. Hence, add at least 2 admin users to your WordPress site if you enable this option.
By following the tips in this article and installing the Wordfence plugin, you can improve WordPress security and protect your website from potential attacks. It is important to keep your site safe from potential hackers, and Wordfence can help to do just that.
Be sure to install the plugin on your WordPress site and keep it up to date for the best protection possible for your website.







Leave a Reply